Apparently, this article is for webmasters and web developers especially because it is about something to do with domain and hosting. Actually, when we talk about nameservers that simply refers to as domain nameservers that looks like:
ns1.webhosting.com and ns2.webhosting.com
Above is the example of default domain nameservers that we get on buying any shared hosting from our host online but if you want to have your own custom domain nameservers such as ns1.techstribe.com and ns2.techstribe.com then you got to buy VPS hosting which means virtual private server for you website.
Setting up your Custom Domain Nameservers in Domain Control Panel
As I said earlier that for creating custom domain nameservers you must have to buy VPS server for your website that will have 2 IPs which are needed while setting up custom domain namerservers.
Alright, if you have VPS server and want to setup custom domain nameservers then follow the steps bellow:
- Login to Domain control panel from where you bought domain
- Now, make sure you have 2 IPs from your VPS server
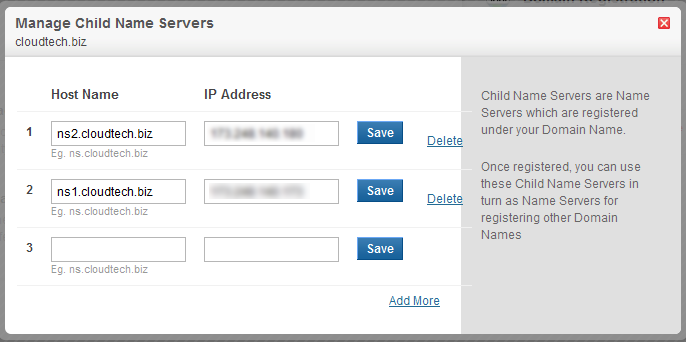
- From domain control panel click on SETTINGS icon or you may find register nameservers on the same screen
- To register nameservers just add ns1 and then the corresponding IP that you want to point to ns1 (similarly for ns2)
- All done and let me know in comments if you have any questions
So, that’s how we actually make our own custom domain nameservers and if you face any problem while registering your nameservers from domain control panel.
